 |
| Create Felt Ornaments or Pictures |
Create Felt Applique Ornaments or Pictures with the Sewing Machine
Felt is one of the best fibers to use for applique because it doesn't fray and doesn't require turning under the edges. Felt is also thick enough to create depth for artistry. We don't use fleece for pictures or ornaments because fleece has a layer of foam in the center. It doesn't cut as clean and tends to rough up when sewing.
Felt Backing Fabric
Whatever you choose to make, cut a backing piece or use a precut felt square or rectangle for a background. Your felt art is enhanced with a backing piece, and it holds small pieces together. If you're making an ornament for any holiday, start with a piece of felt for the backing. Once you have the ornament designed and completed, cut the backing the shape of the outline or outer edge with about 1/4 inch extended for a "frame."
Use Our Pattern or Make Your Own
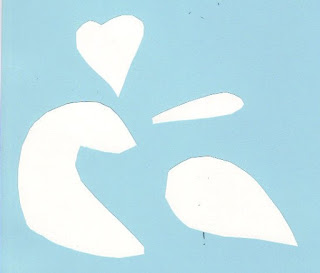
We made a Pennsylvania Deutsch bird. Here are the basic parts if you want to make one similar. You probably know that "Deutsch" is a word for German, and these crafty people were Germans who settled in Pennsylvania. You may have heard it as Pennsylvania Dutch. They created designs with hearts, birds and flowers -- all themes we like for today's crafts.
 |
| Basic Pattern for Pa. Dutch Bird Picture |
We found a tan backing and started cutting the bird body and pieces to fit the size of the backing (9 x 11 inches) Our bird body is about 3 1/4 inches by 3 1/4 inches (less the tail and crown). Then we cut some wing pieces, tail and crown feathers.
Design Elements
Design your work so it's not symmetrical, but is balanced, with something at the "floor" to ground the bird. Otherwise, he might look like he's flying away. A tulip is common in Pennsylvania Deutsch designs, so we added a flower at the base of our picture.
How to Make the Design
 |
| Layout Without Sewing or Pins |
Lay the cut pieces on the backing and work with it until you get a design you like. Once you get it the way you want, you can pin the pieces in place or count on your memory to place the pieces where you want them. Because we do freehand work, you can see a difference in the layout and the completed picture.
Use a thread color that will be pleasing with the felt colors. We used red on this one, although the bird is a deep purple. Sew the bird body in place, and then sew the other pieces as you choose. Be creative.
We made the wing in three layers so it would have depth. If you choose to do this, sew the red layer in place first, then add the beige and purple layers, sewing far inside the outside edge so the wing will stand out.
Completing the Design
Add enough design elements to keep your picture or ornament from looking sparse. We added some green leaves. Freehand stitch with the sewing machine if you choose. We added some stems and a couple of leaves in green thread and a connector for the crown and tail in red thread. They don't show well in the picture because it's a scan, but they are placed on the backing material only, and done after the basic design was completed. The image at the top shows the bird sewn onto the fabric before adding the freehand stitching.
Everything in this picture was done with straight-stitching on a basic sewing machine, so you don't have to have anything fancy to make this work. If you have a sewing machine that does fancy stitching, you may want to experiment.
See you soon!
Linda
 |
| Back of Design Showing Red Stitching |
 |
| Stitching Doesn't Show Because of Thickness |
No comments:
Post a Comment